1. Hardware requirements
To use this app you need to have the following hardware installed:
- Solar panels + inverter on-grid (any brand) ☀️🔋
- A Tesla car 🚘
- The following smartmeter, determined by what kind of electricity system you use to charge your Tesla:
a) 1 phase electricity: Shelly EM + 1 CT clamp 🔌
b) split-phase electricity (only used in North America): Shelly EM + 2 CT clamps 🔌
c) 3 phase electricity: Shelly 3EM or Shelly Pro 3EM 🔌
You can buy the smartmeter either from the Shelly website, Amazon, or a different store.
❌ Do not install this app if you don’t have all of the hardware listed above as it will not work without it ❌
A stable internet connection is required for the smart meter (Wi-Fi) and Tesla car (Wi-Fi or cellular) 📶
The Shelly smart meter is an energy meter that you need to buy 🔌
Please refer to the manufacturer’s instructions on how to install ⚡️
Here is a rough schematic illustrating how to position the smart meter to accurately measure energy flow TO and FROM the grid🔌
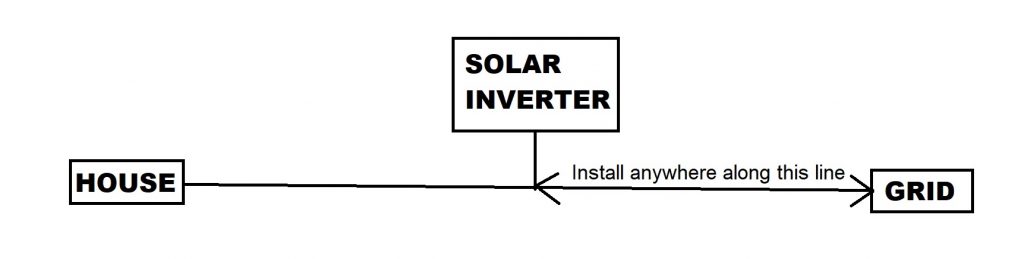
If you’ve installed your smart meter correctly, it should display negative readings when you’re sending surplus energy back to the power grid.
This is the surplus power that the app uses to charge the car. Double check this value in the Shelly app and make sure the meter shows negative values when inverter sends power to the grid. If it shows positive values, you need to disconnect the clamp, rotate it 180 degrees and connect it again to the wire. If the meter is not set right, it will not work.
2. How to enter data from the Shelly smart meter into the app
You need to copy Shelly ID, Shelly Authorization Key and Shelly URL values from your Shelly account in order to enter them in the app.
Here is how to do it:
Shelly ID:
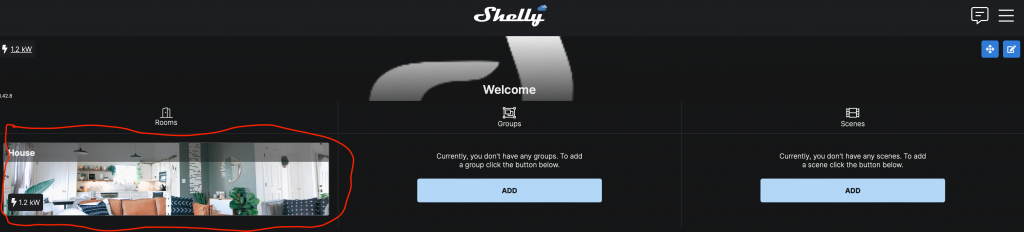
Go to home.shelly.cloud on a DESKTOP browser and sign in.

Choose your room.
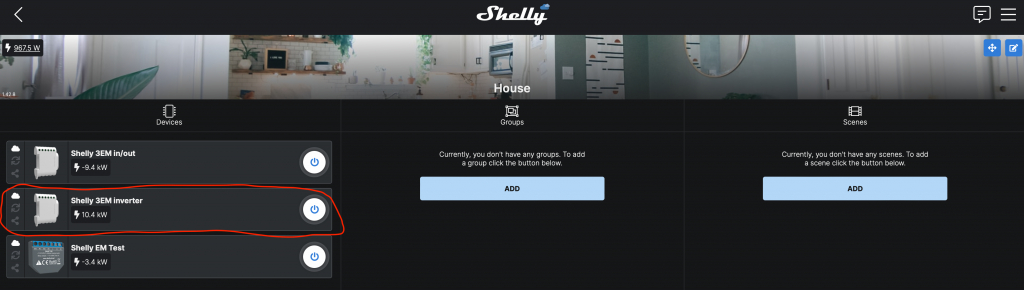
Choose you device.
Select Settings from the right pane
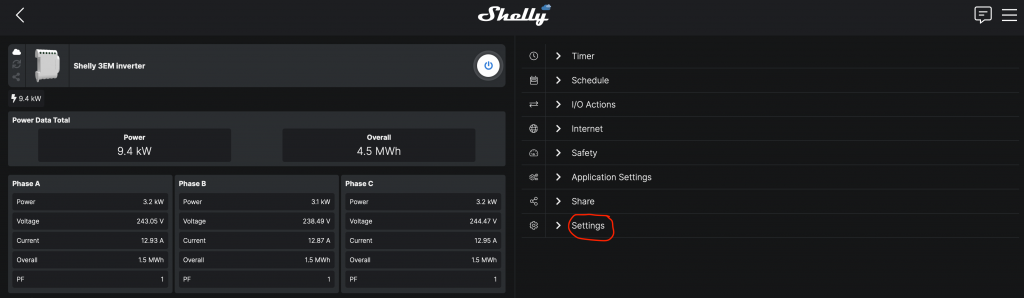
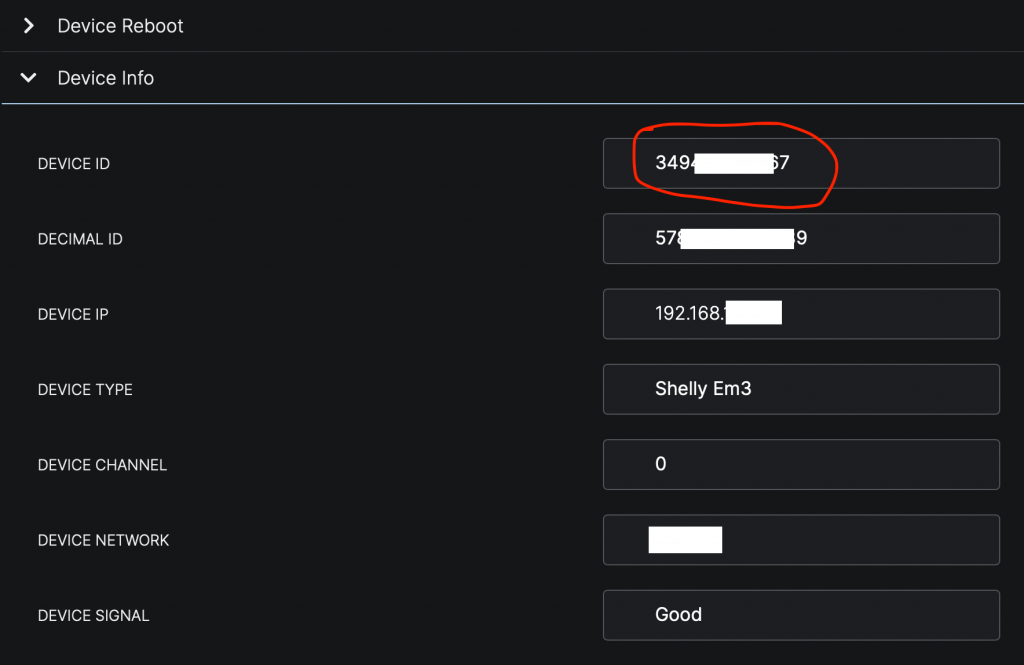
Select Device Info (at the bottom).
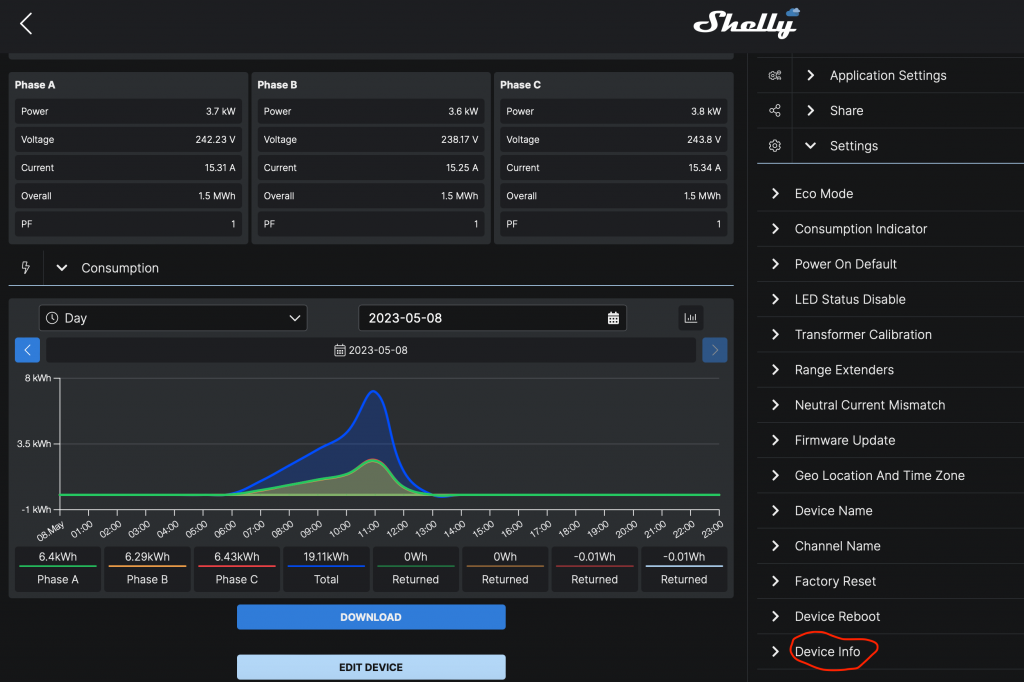
Copy the value under DEVICE ID. This is the Shelly ID:
Shelly Authorization Key and Shelly URL:
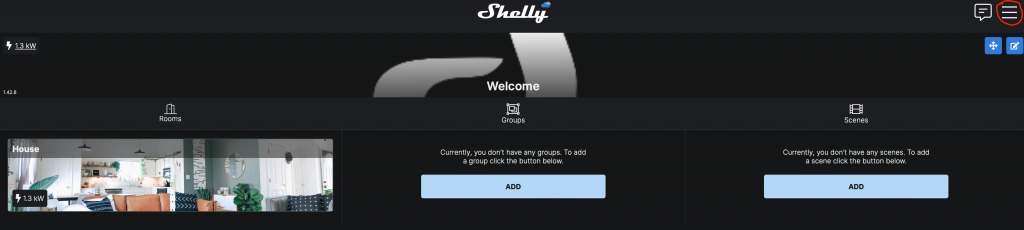
Go back to home.shelly.cloud and click on the 3 vertical lines at the top right of the webpage.
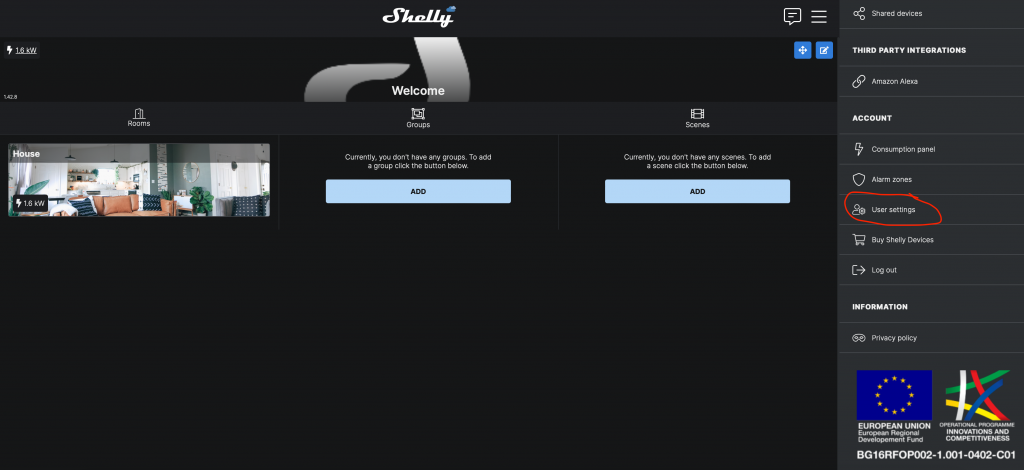
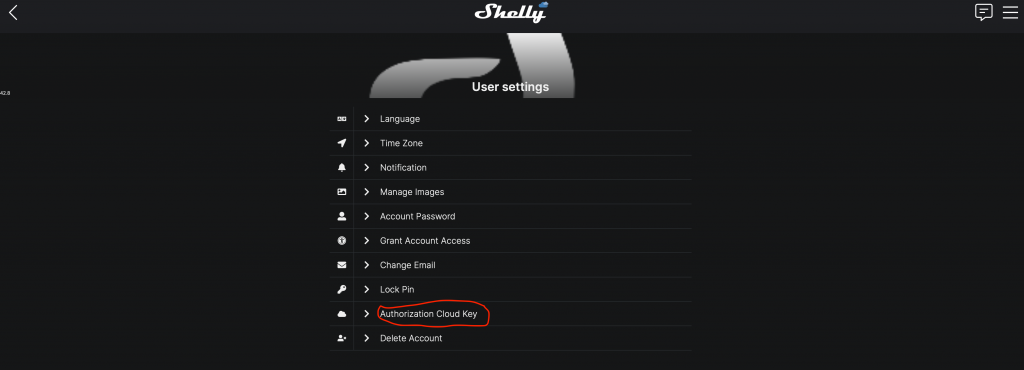
Scroll down and click User Settings
Click Authorization Cloud Key
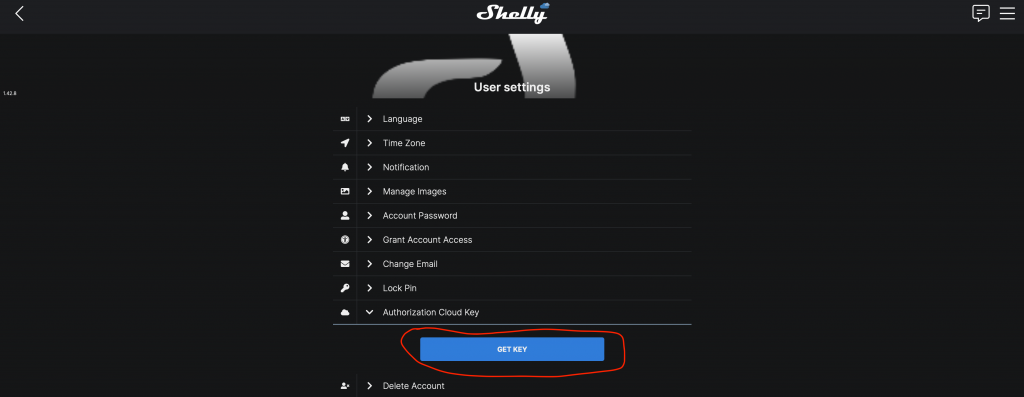
Click Get Key.
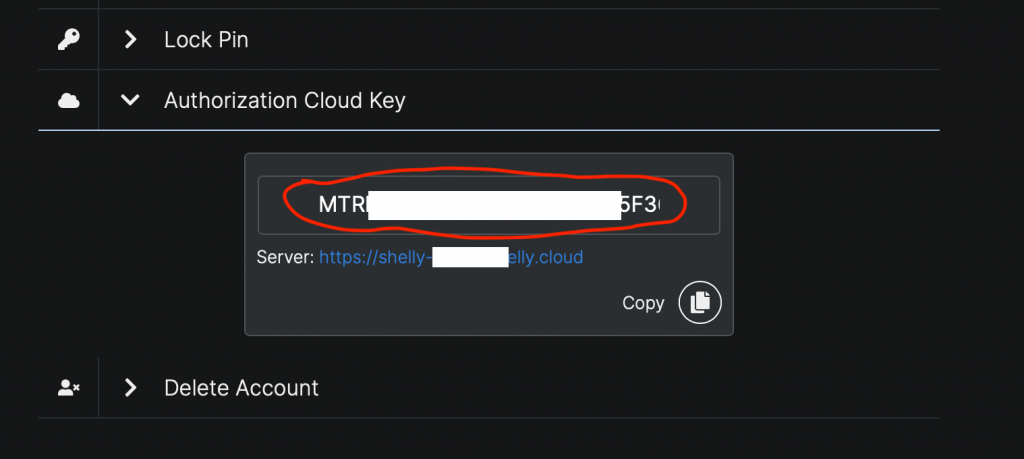
First value is Shelly Authorization Key:
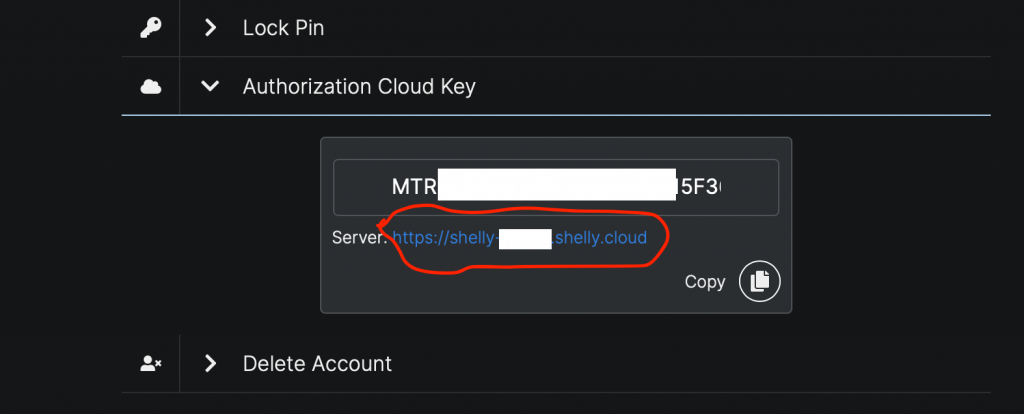
Second value is Shelly URL:
Copy Shelly ID, Shelly Authorization Key and Shelly URL.
Go back to the app and paste these values.
You can now charge from the sun 😌